Session 5 - Tools for creating marketing materials
Publisher 2016
I highly recommend watching the Linked In Learning (Lynda.com) Tutorials in the Publisher 2016 Essential Training course.The first link should go to the course, but I have selected certain videos that I thought were important and they are included in the playlist below.
Don't forget to download the files if you want to practice along with the tutorial
https://www.linkedin.com/learning/publisher-2016-essential-training/understanding-the-interface?u=37707396
Here is the list of videos from the above course that I recommend:
Playlist
2. Working with Text
- Using built-in templates
- Adding and modifying placeholder text
- Inserting text from another file
- Flowing paragraph text with placeholders
3. Working with Objects
- Using the scratch area
- Drawing and customizing shapes
4. Working with Graphical Objects
- Inserting and swapping pictures
- Working with picture placeholders
- Using pictures as backgrounds
6. Customizing Layout and Design
- Creating and applying master pages
- Changing the page background
- Saving design changes to a template
9. Printing and Sharing Publications
- Previewing and printing your publication
- Setting commercial print options
To get started, we will watch
- Understanding the Interface
- Using the scratch area
Please watch the rest of the tutorials in your own time.
Brief Rundown on Publisher features
Microsoft Publisher is Microsoft's Desktop Publishing tool. You should have it as part of the Office 365 suite.There are many templates available in Publisher, but as creating a document using a template is easy, we will concentrate on the features of Publisher and where it differs from Word.
Start by creating a blank document.
One of the main differences is that Publisher has lots of features that are purely there to help you lay out your document. The first of these are the rulers (yes there are also rulers in Word). You will see the ruler across the top and down the left hand side.
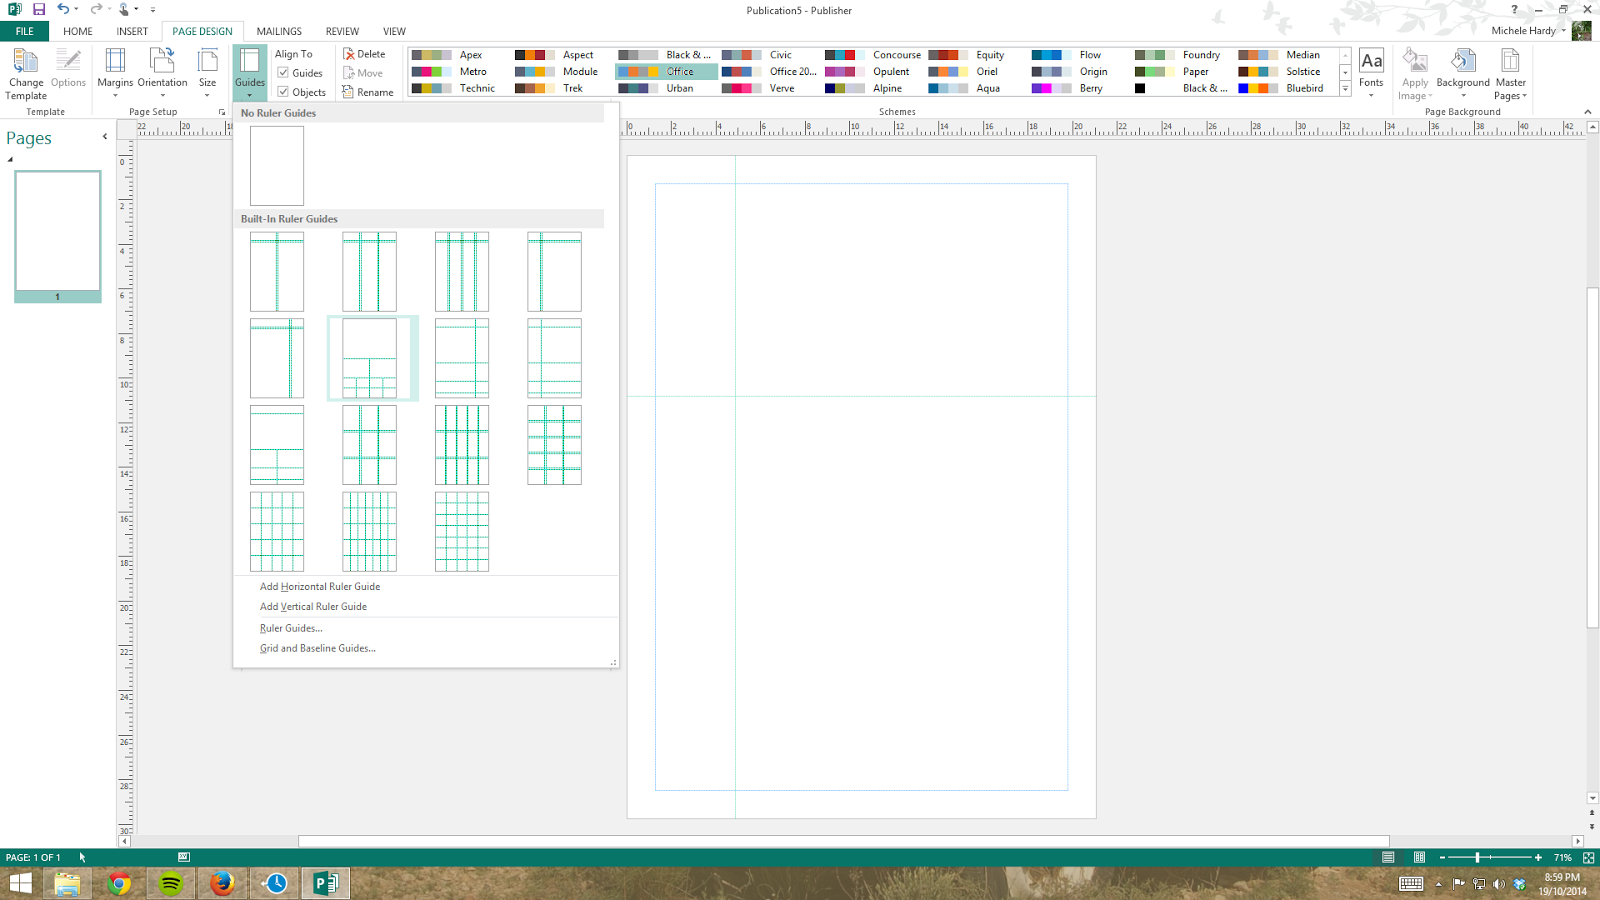
You also have Guides that you can use to help lay out your document. You can place guides anywhere on your page - they are there to help you line items up and are not visible on your final product.
There are also preset Guides that you can use. You can find these under Page Layout.
Once you have guides on your page, you can tick the option to align objects to the guides.
As you move objects around the page, you will see that the guides will highlight so that you can easily align to them.
The grey areas to the sides of your publication is called the scratch area. You can place objects here so that they are available easily when you need them.
The above shows multiple images selected when using the Insert Picture option. When I click Insert, all of these images will be placed into the scratch area.
They can then be dragged onto the pages when needed. You can also do a "swap" by using the icon in the middle of the picture and dragging the image on top of any image on your page.
Building Blocks can also be used to add items to your publication. Building Blocks are under the Insert Ribbon.
http://office.microsoft.com/en-au/publisher-help/use-building-blocks-to-quickly-create-a-publication-HA101823829.aspx
By using right-click on an object, the context sensitive menu includes the ability to use the object as a background or to add it to the building blocks.
Once you have lots of images with your publication, you can use the Graphics Manager to keep track of where they all are.
As well as full page brochures, there are many other page layout options that you can use to create different types of publications.
The following is an example of using publisher to create business cards. Create a new publication and choose More Blank Sizes to select from the many preformatted paper sizes available.
Choose the card size and design your business card
When you go to print, it will print however many it needs to on the one page.
One of the activities is to create a bookmark. I like to have something inspiring written on them, Here are a few sites to help with that.
http://ebookfriendly.com/best-quotes-books-reading/
http://bilingualmonkeys.com/43-great-quotes-on-the-power-and-importance-of-reading/
https://www.goodreads.com/quotes/tag/reading
Tips for creating Bookmarks
- Decide on the size of the Bookmark
- Create a custom size
- Make sure you want multiple per page
- Design your bookmark
- Print your Bookmarks
See screenshots below as a sample:
Publisher Activity
Create your own business cards for Mysty River Regional Library Service - be imaginative.Create a bookmark suitable for primary school children
Create a bookmark suitable for teenagers
Online design tools
For those students who do not have access to Publisher, or don't want to use it, here are some other tools that you can use to create print material. I have tried to keep this list to online resources or those that are open source and cross platform.Canva
https://www.canva.comCan I just say that I LOVE Canva. Crowd-funded and Australian - read their history here
Help and videos
https://www.canva.com/learn/design-school/
https://designschool.canva.com/tutorials/
We will watch the following two video in class.
https://www.canva.com/learn/tutorials/getting-started-canva/
https://www.canva.com/learn/tutorials/share-download-print-or-publish-in-canva/
Crello
https://crello.comCrello Help and support
Desygner
Desygner has a free option plus a premium subscription
Other online options
Design Wizard: https://www.designwizard.com/
Be Funky: https://www.befunky.com/
Online Design Tool Activity
Create your own business cards for Mysty River Regional Library Service - be imaginative.Create a postcard for Mysty River Regional Library service School holiday program
Create a bookmark suitable for primary school children
Create a poster for MRRLS homework club
** If you can, download and share in our Facebook Group


Story of this blog is well written. The writer kept in consideration the grammar very well. Level of English also very well. Lot many new words has been used while writing content of this blog. Cert Iv Building And Construction Vic
ReplyDelete